


3D 12 линий 360 Германия лазерный диод OSRAM вращающийся нивелир/Япония sharp синяя линия> 100 модели для
- Категория: Инструменты для измерения уровня >>>
- Поставщик: Hangzhou,Electricdriving,Technology,Co.,Ltd.
Поделиться:
Описание и отзывы
Трекер стоимости
| Месяц | Минимальная цена | Макс. стоимость |
|---|---|---|
| Sep-20-2025 | 48.81 $* | 50.33 $* |
| Aug-20-2025 | 47.1 $* | 49.65 $* |
| Jul-20-2025 | 40.2 $* | 42.98 $* |
| Jun-20-2025 | 46.87 $* | 48.55 $* |
| May-20-2025 | 40.3 $* | 42.54 $* |
| Apr-20-2025 | 46.25 $* | 48.49 $* |
| Mar-20-2025 | 45.90 $* | 47.52 $* |
| Feb-20-2025 | 45.15 $* | 47.28 $* |
| Jan-20-2025 | 44.82 $* | 46.14 $* |
Характеристики
Product Description
| Items | Parameter |
| Undervoltage Prompt | Power Light Flashing |
| Vertical/Levelling Accuracy | ±1.5mm/5m |
| Auto-levelling Range | 3° |
| Laser Class | Class Ⅱ |
| Width Of Laser Line | 532nm |
| Temperature Range | -10℃~+45℃(14℉-113℉) |
| Power Supply | Lithium Battery |
| Product Name | Parameter |
| Color | black |
| Type | L3D-12 |
| Brand Name | ARITA |
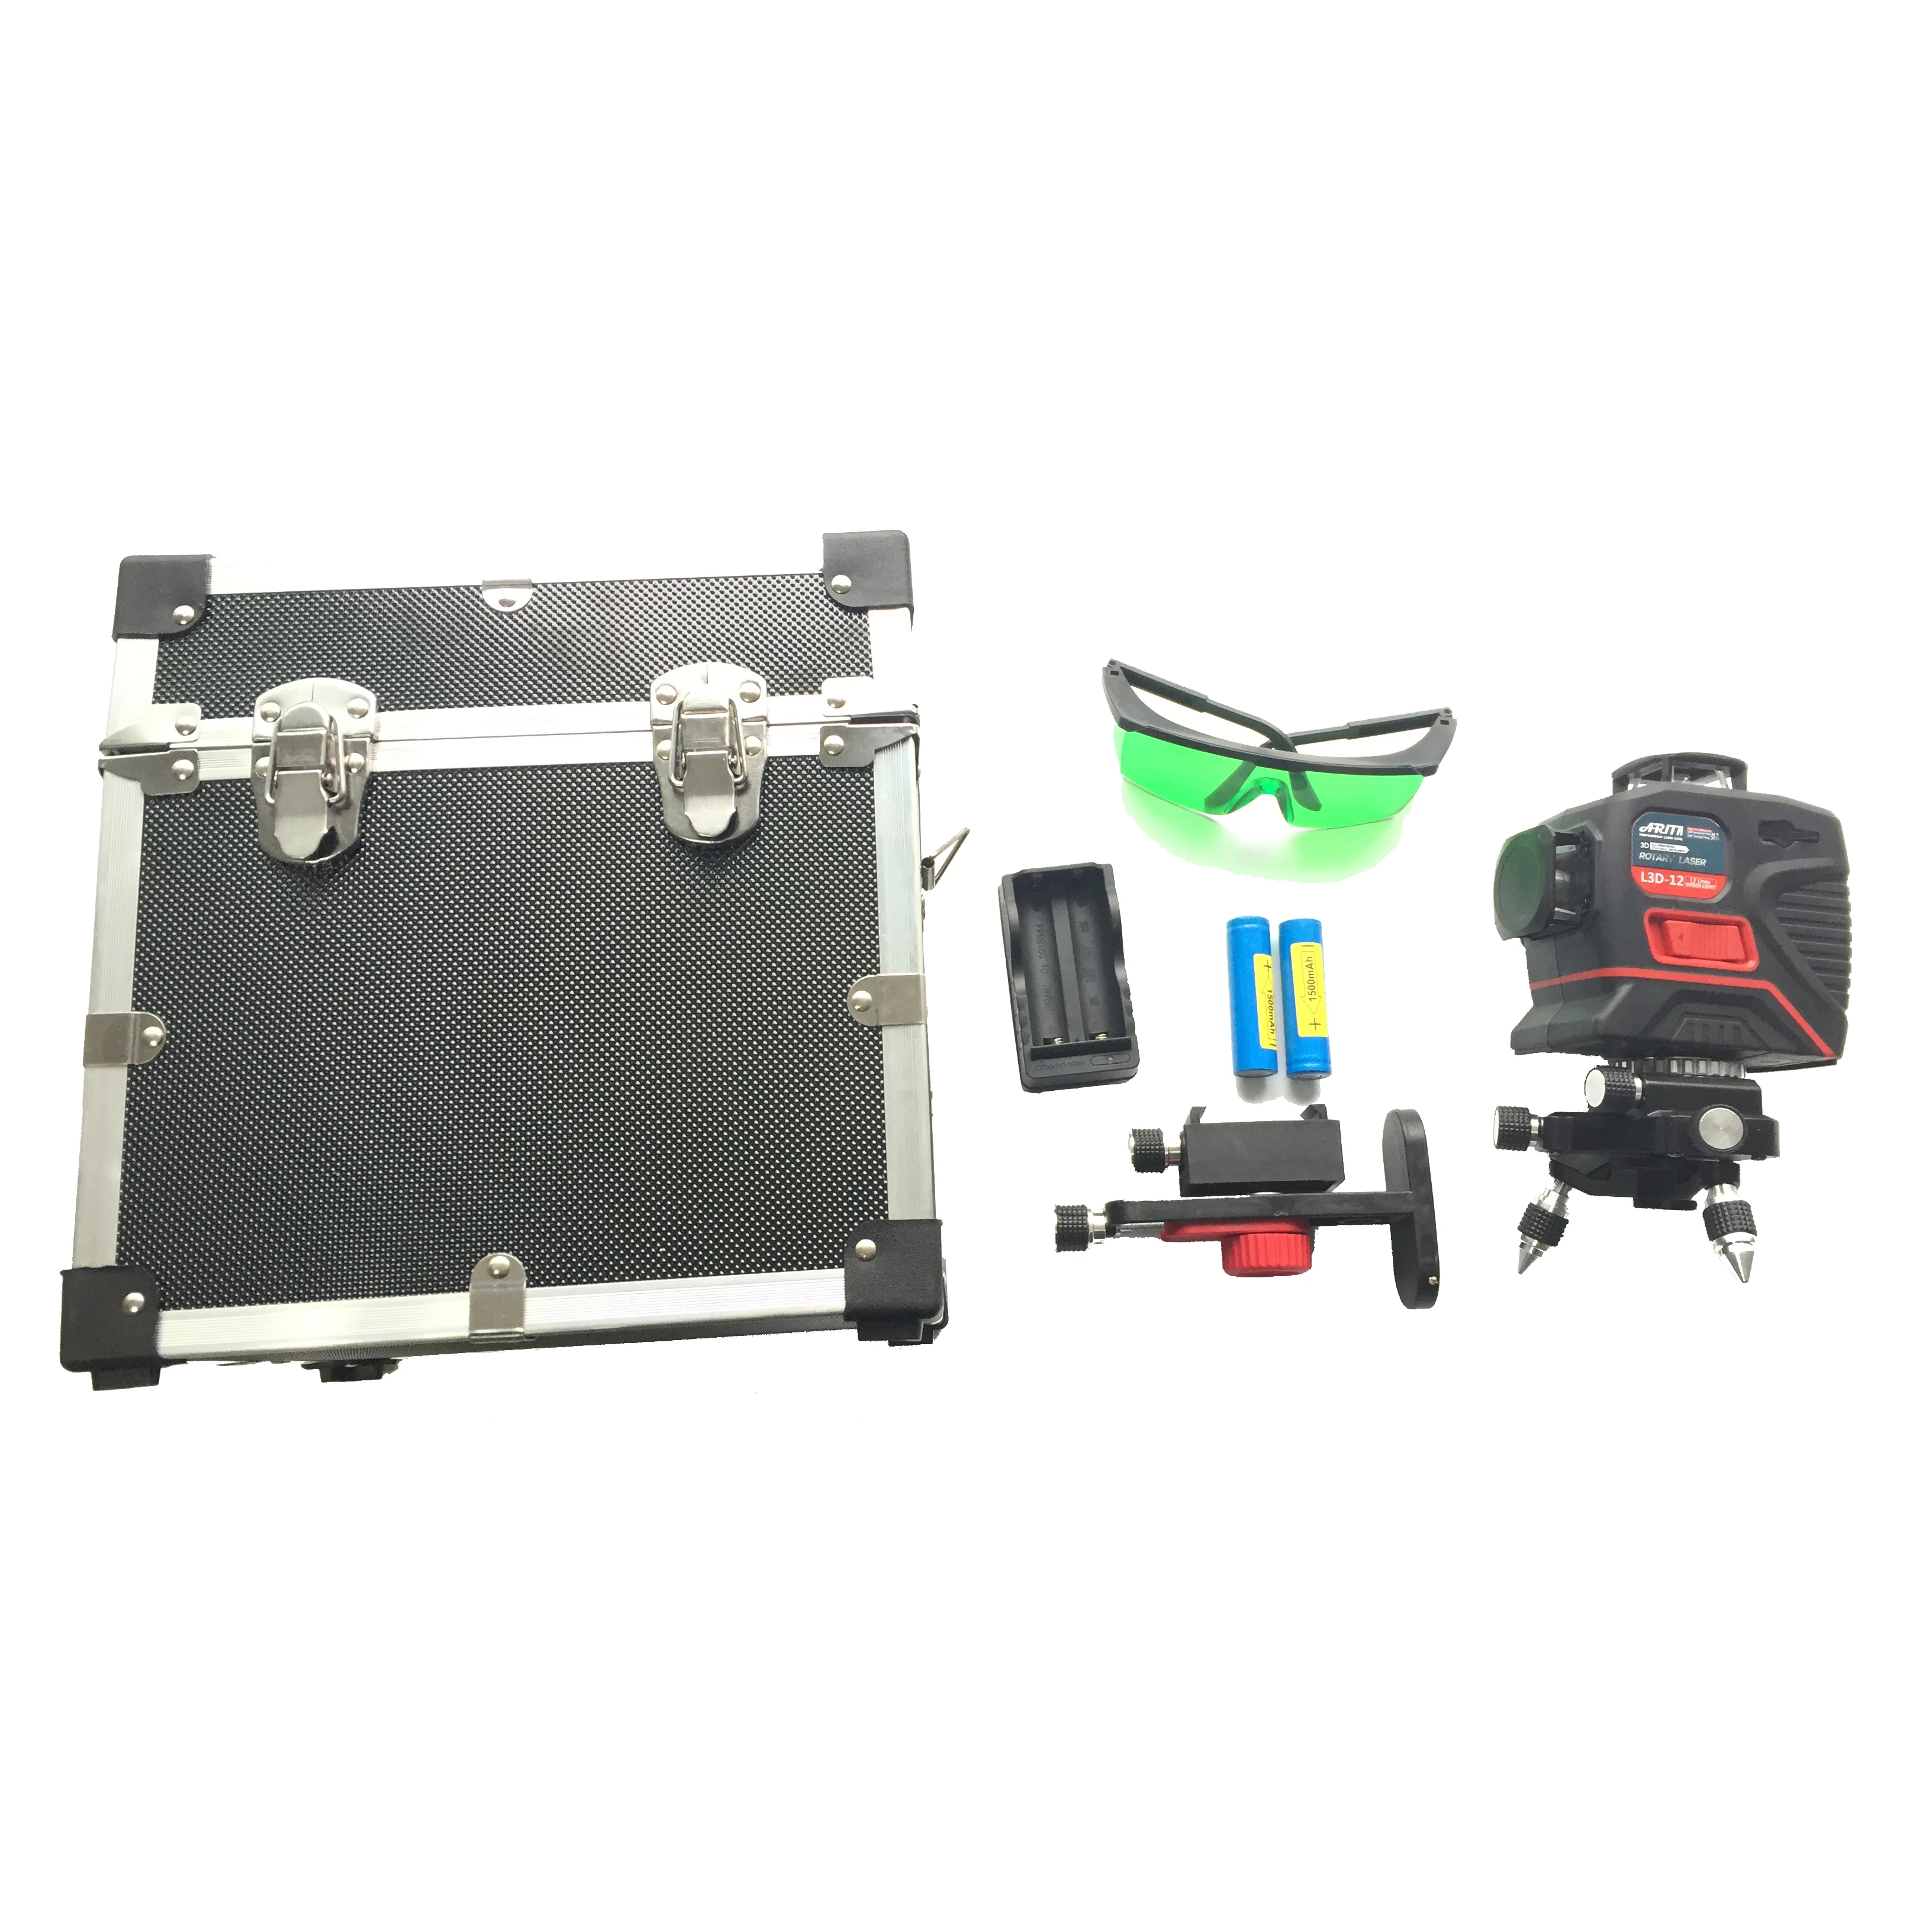
Accessory | Goggle,Battery,Charger,Shelf |
Undervoltage Prompt | Power Light Flashing |
Proof | IP54 strong dustproof and waterproof |
Product Details


operation
Turn on/off
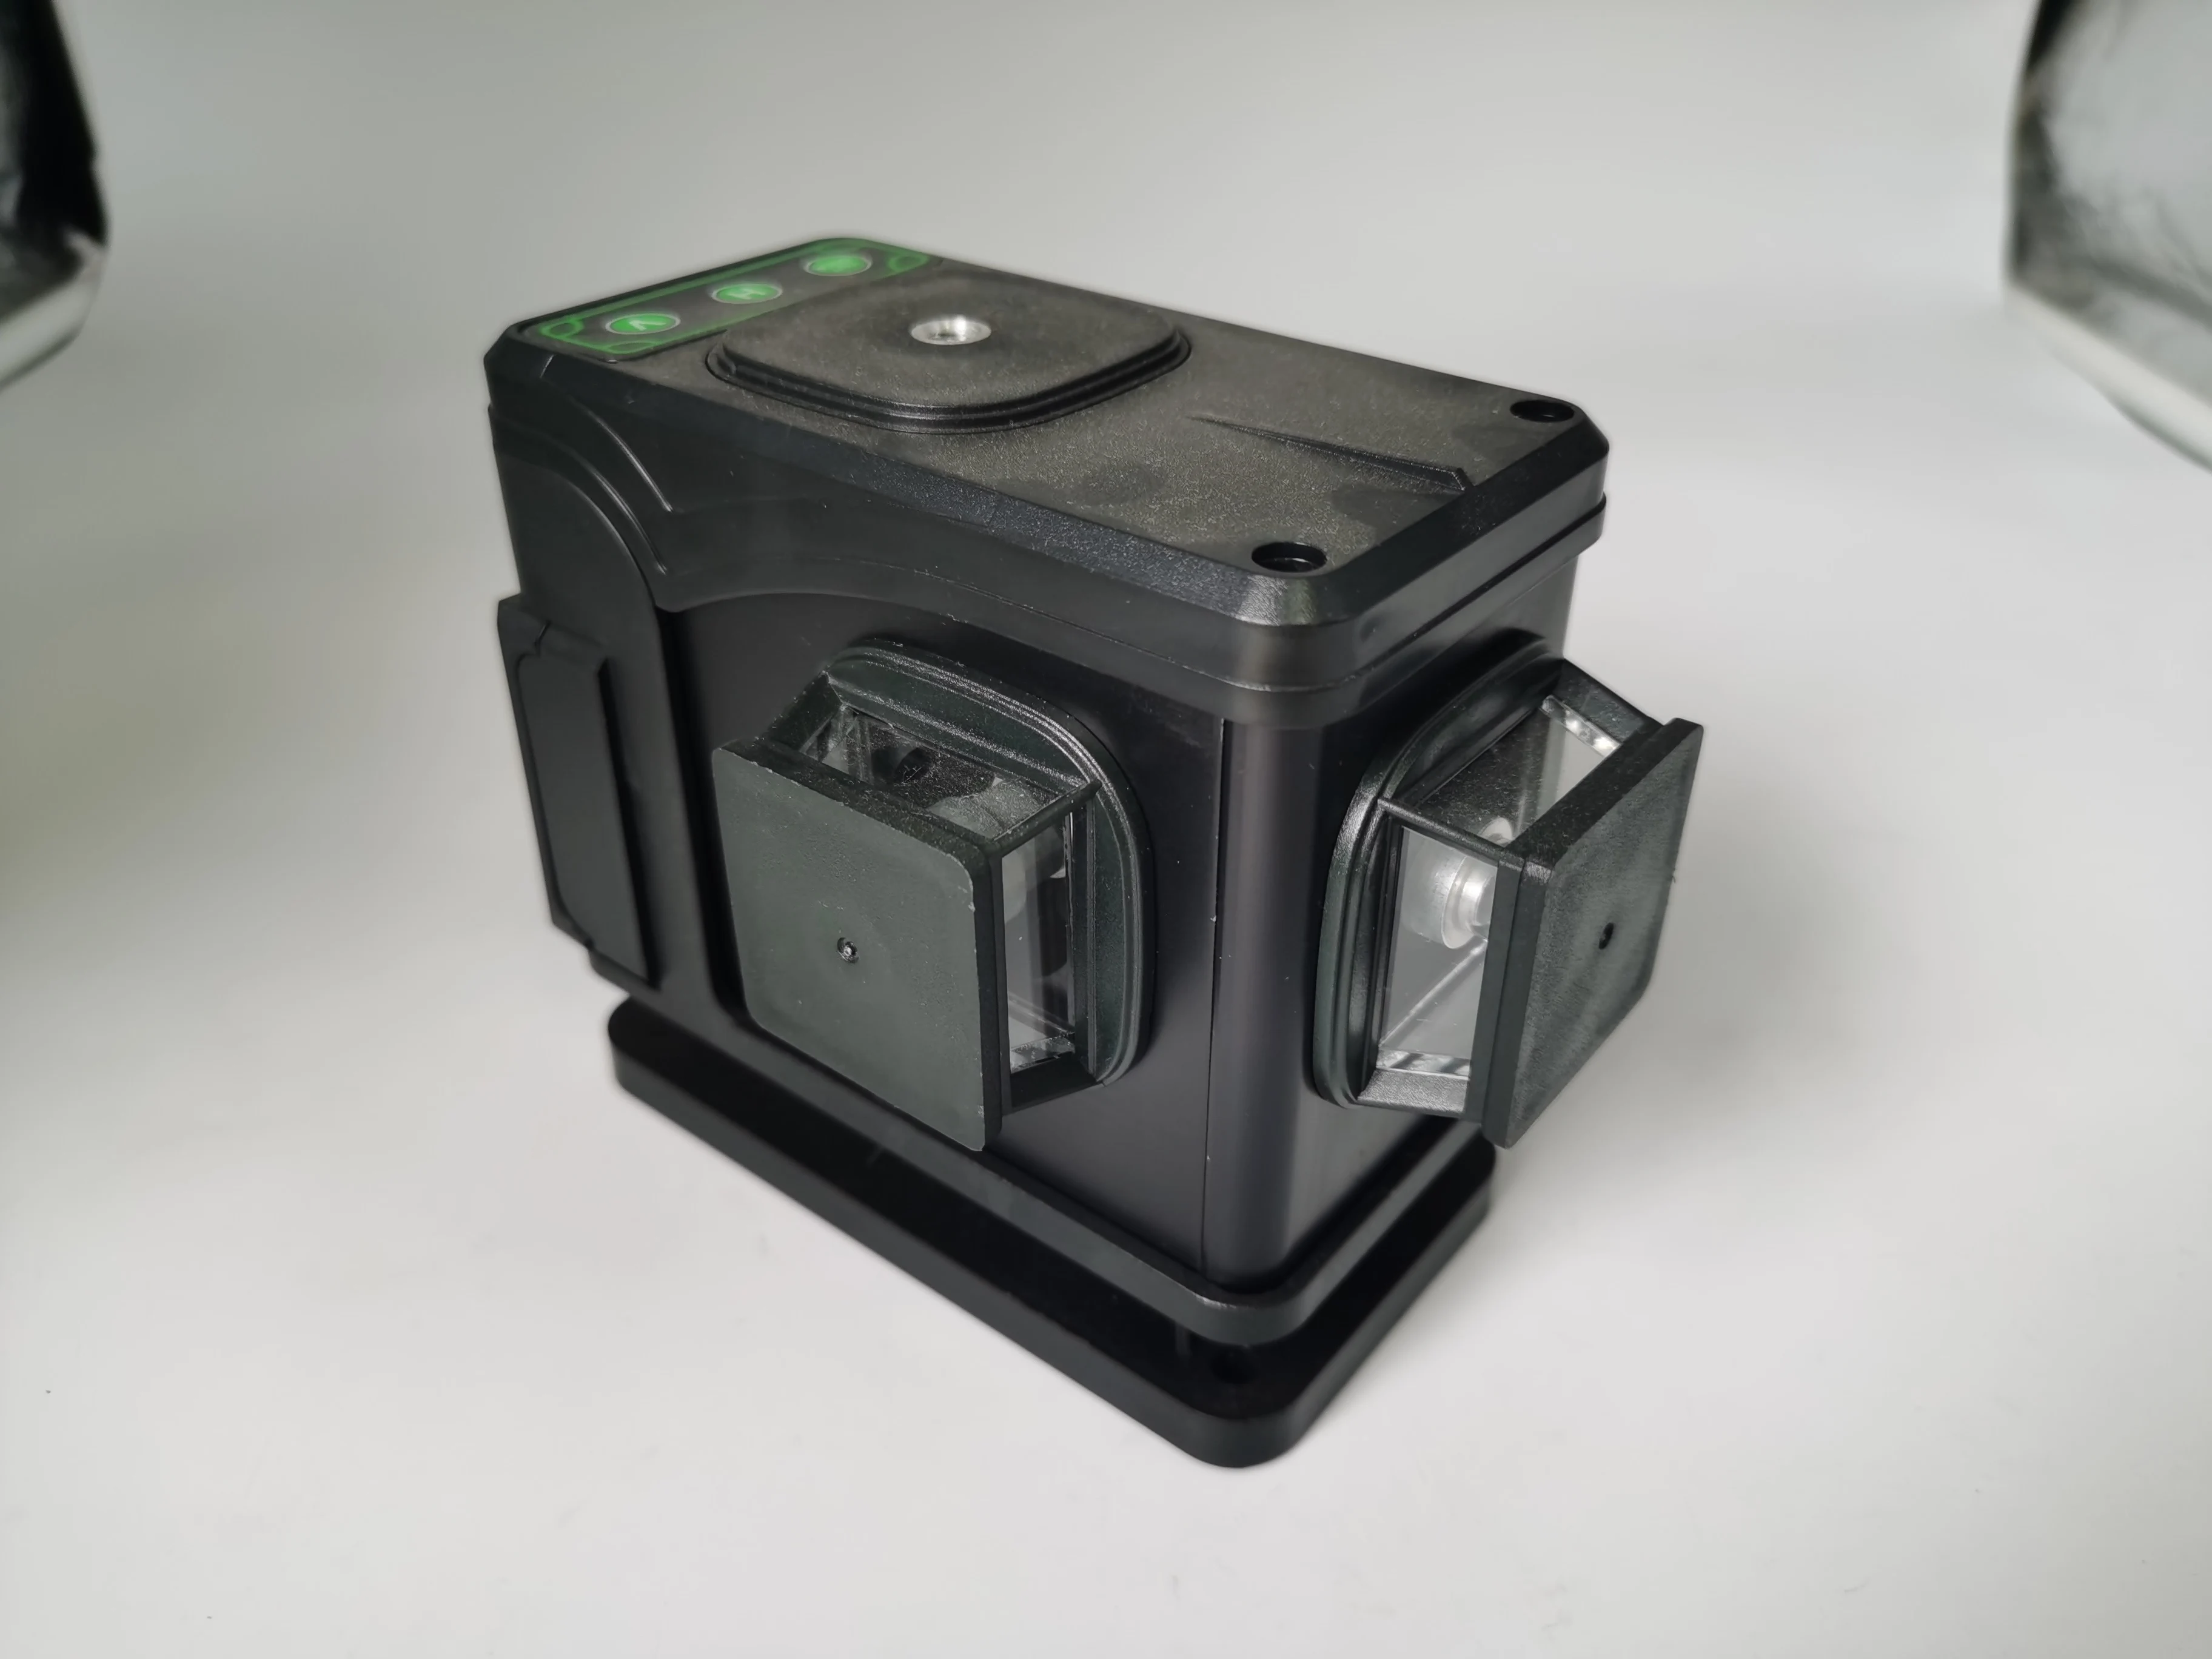
To switch on the measuring tool,push the ON/OFF switch to the" ON" position.Immediately after switching on, the measuring tool sends two laser beams out of the exit opening.
Do not point the laser beam at persons or animals and do not look into the laser on beam yourself, not even from a large distance.To switch off the measuring tool, slide the ON/OFF switch to the "OFF" position.When switching off ,the leveling unit is locked.
Charging Description
The product is equipped with 3.7V Li-ion battery,charge the battery with original charging equipment.
The product is shipped partially charged. Charge the battery before first use.
It is not recommended to recharge the tool for more than 24 hours after each use.
1. Connect the interface charging cable into the power adapter or portable source to ensure proper connection;
2. Open the dust cover charging port on the tool, connect the interface into the charging port to ensure proper connection ;
3. Connect with a power outlet. Charge indicator light will light red, and the charging begins;
4. After fully charged, the indicator light lights green.
Do not charge at very high or very low temperatures. While charging, the power adapter and the instrument will be a slight fever.
Auto-leveling mode
1. Place the tool naturally, until the inner leveling unit stops swinging. The tilted indicator light will be green when the tool finish auto-leveling. Then go on working with the laser.
2. The laser will keep flashing with Buzzer alarming and the tilted indicator will be red, while the tool cannot finish auto-leveling.
3. If auto-leveling is always not possible, it means the surface where the tool stands on deviates by more than auto-leveling range 3 from the horizontal plane. Please place the tool in a position closed to level (<3*from the horizontal plane) .
Work without auto-leveling mode (Lock mode)
This mode always be used as adjust or mark a straight and slant line which exceeds3or more from the horizontal plane. For example, set up the stair rail.
Pay attention that the tool will not show any warning in this mode even it exceeds the auto-leveling range 2.5. This mode cannot be used to perform horizontal or vertical leveling.
1. Keep the rotary knob in "off" position, press the key "H " and "V " to open the corresponding laser,the tool will work in lock mode.
2. The tilted indicator light will always be red to caution the function mode.
3. Place the tool. Then go on working with the laser.
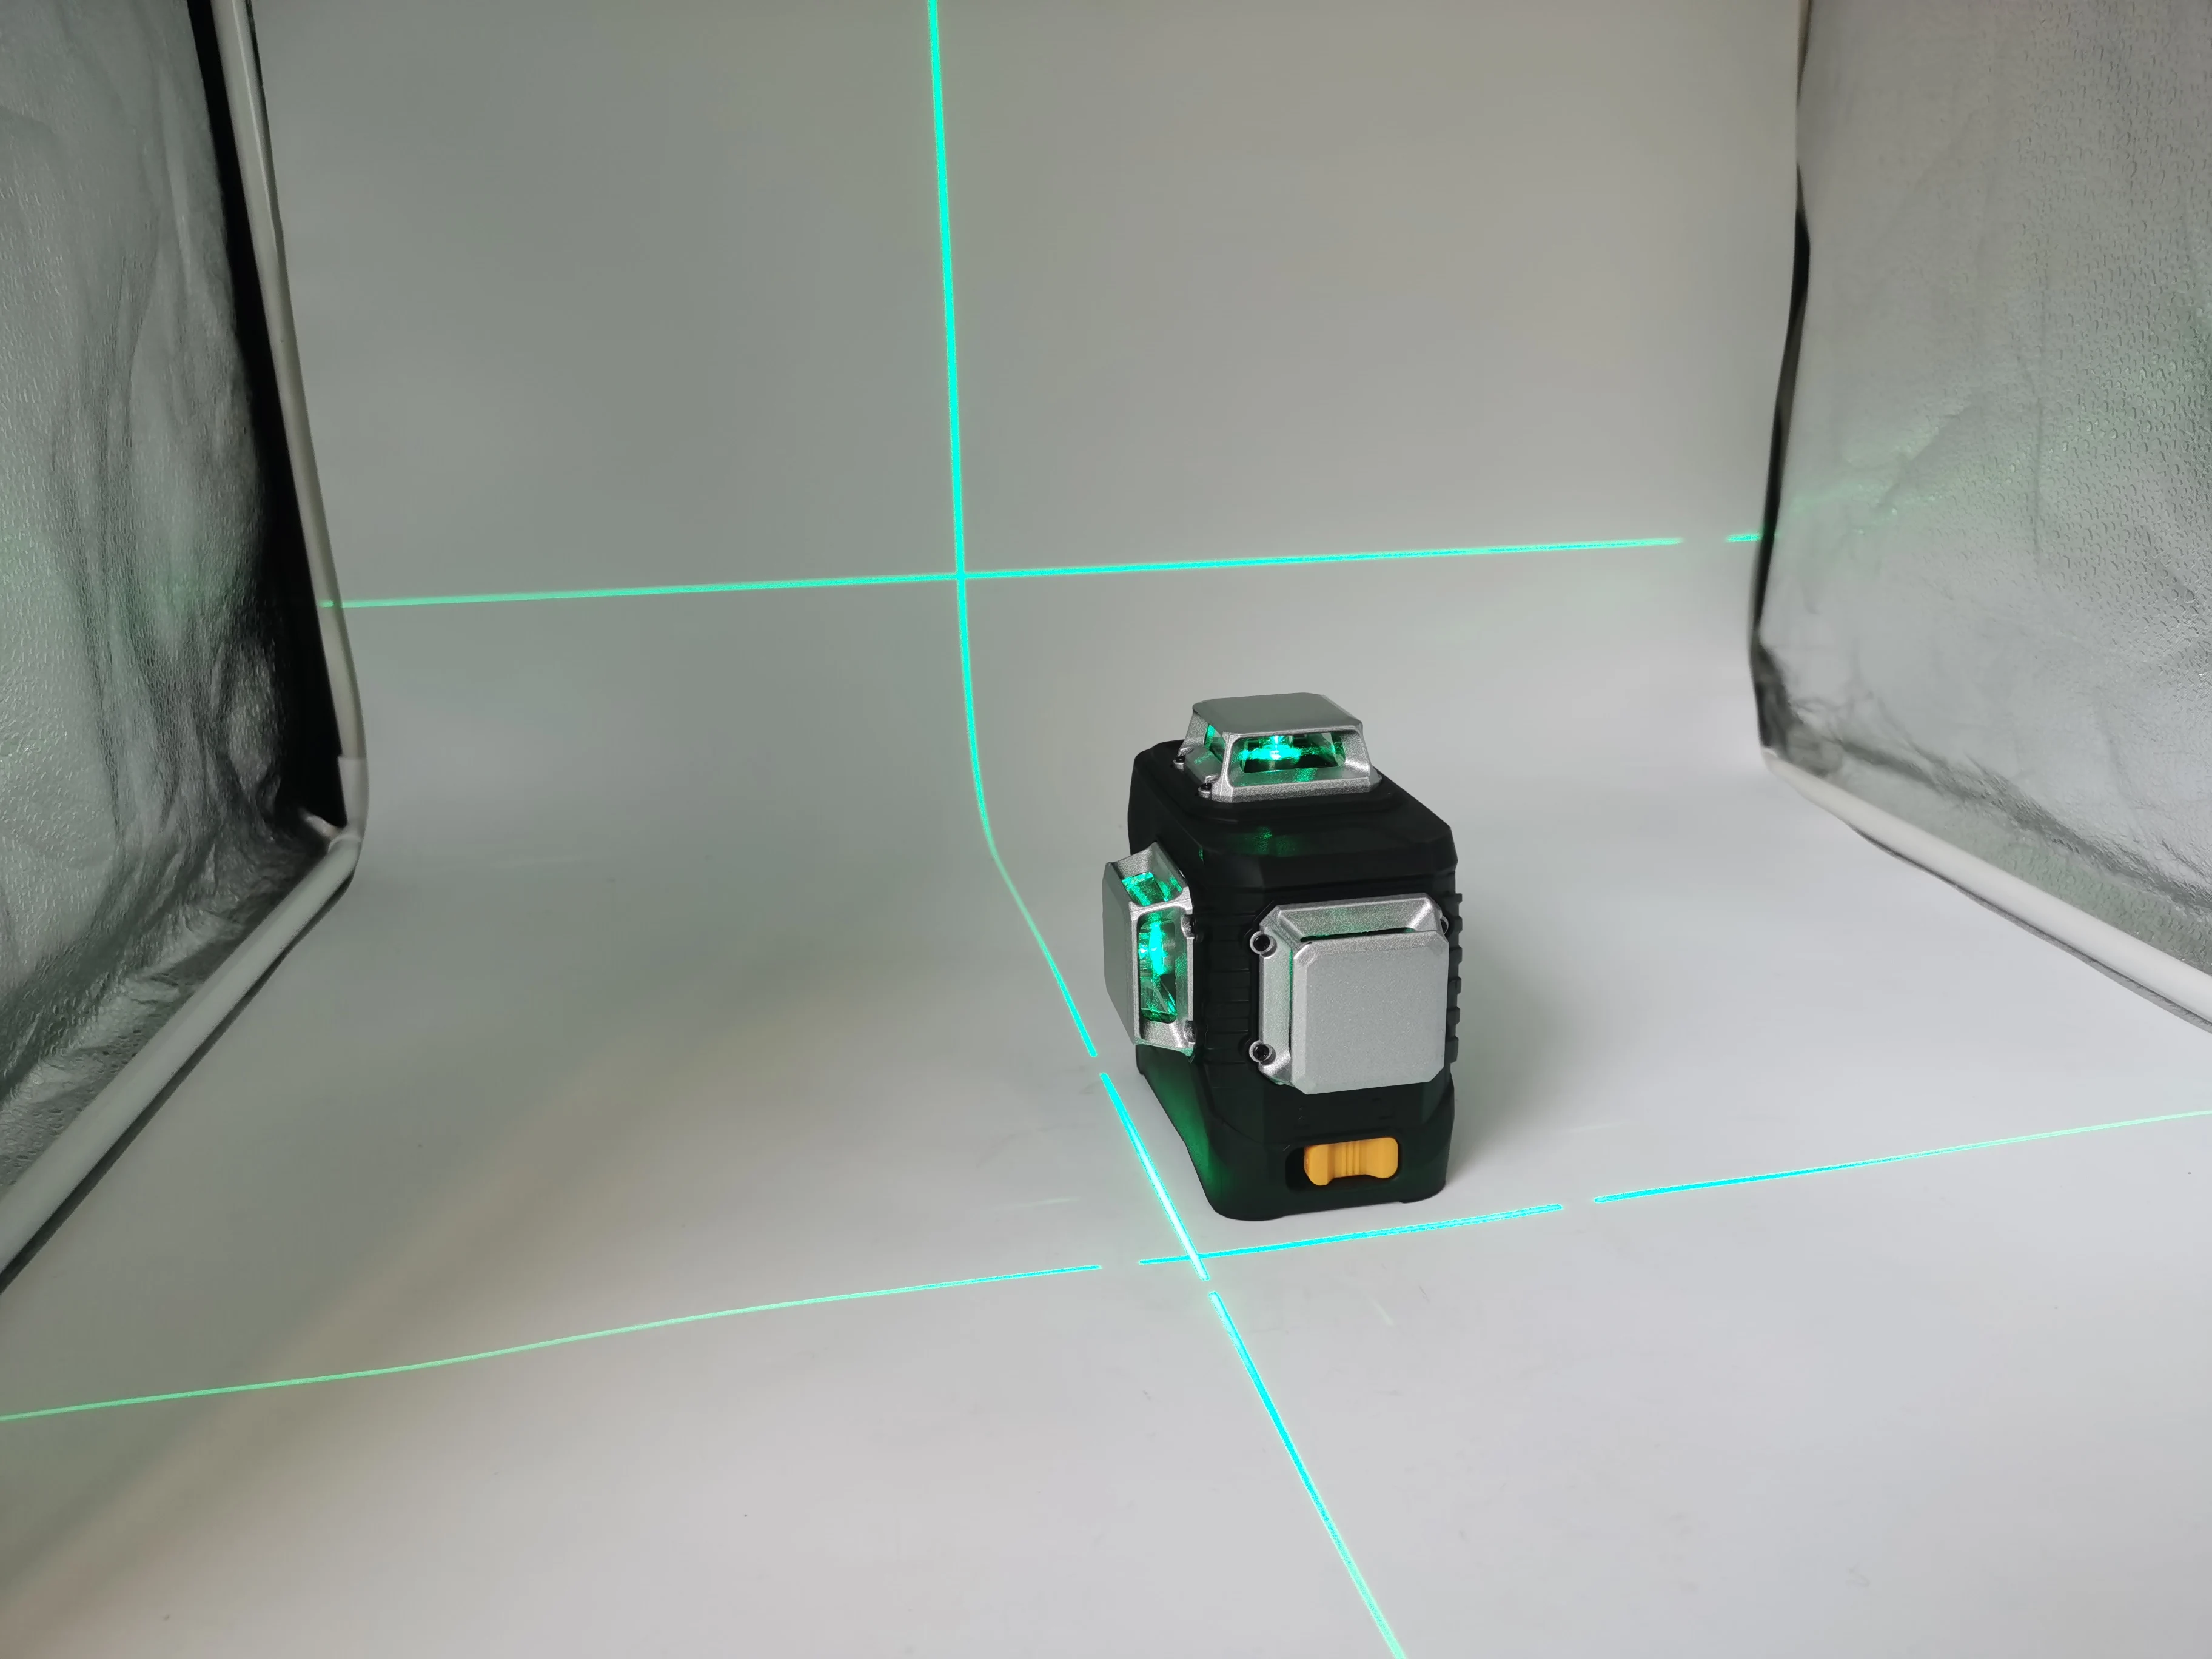
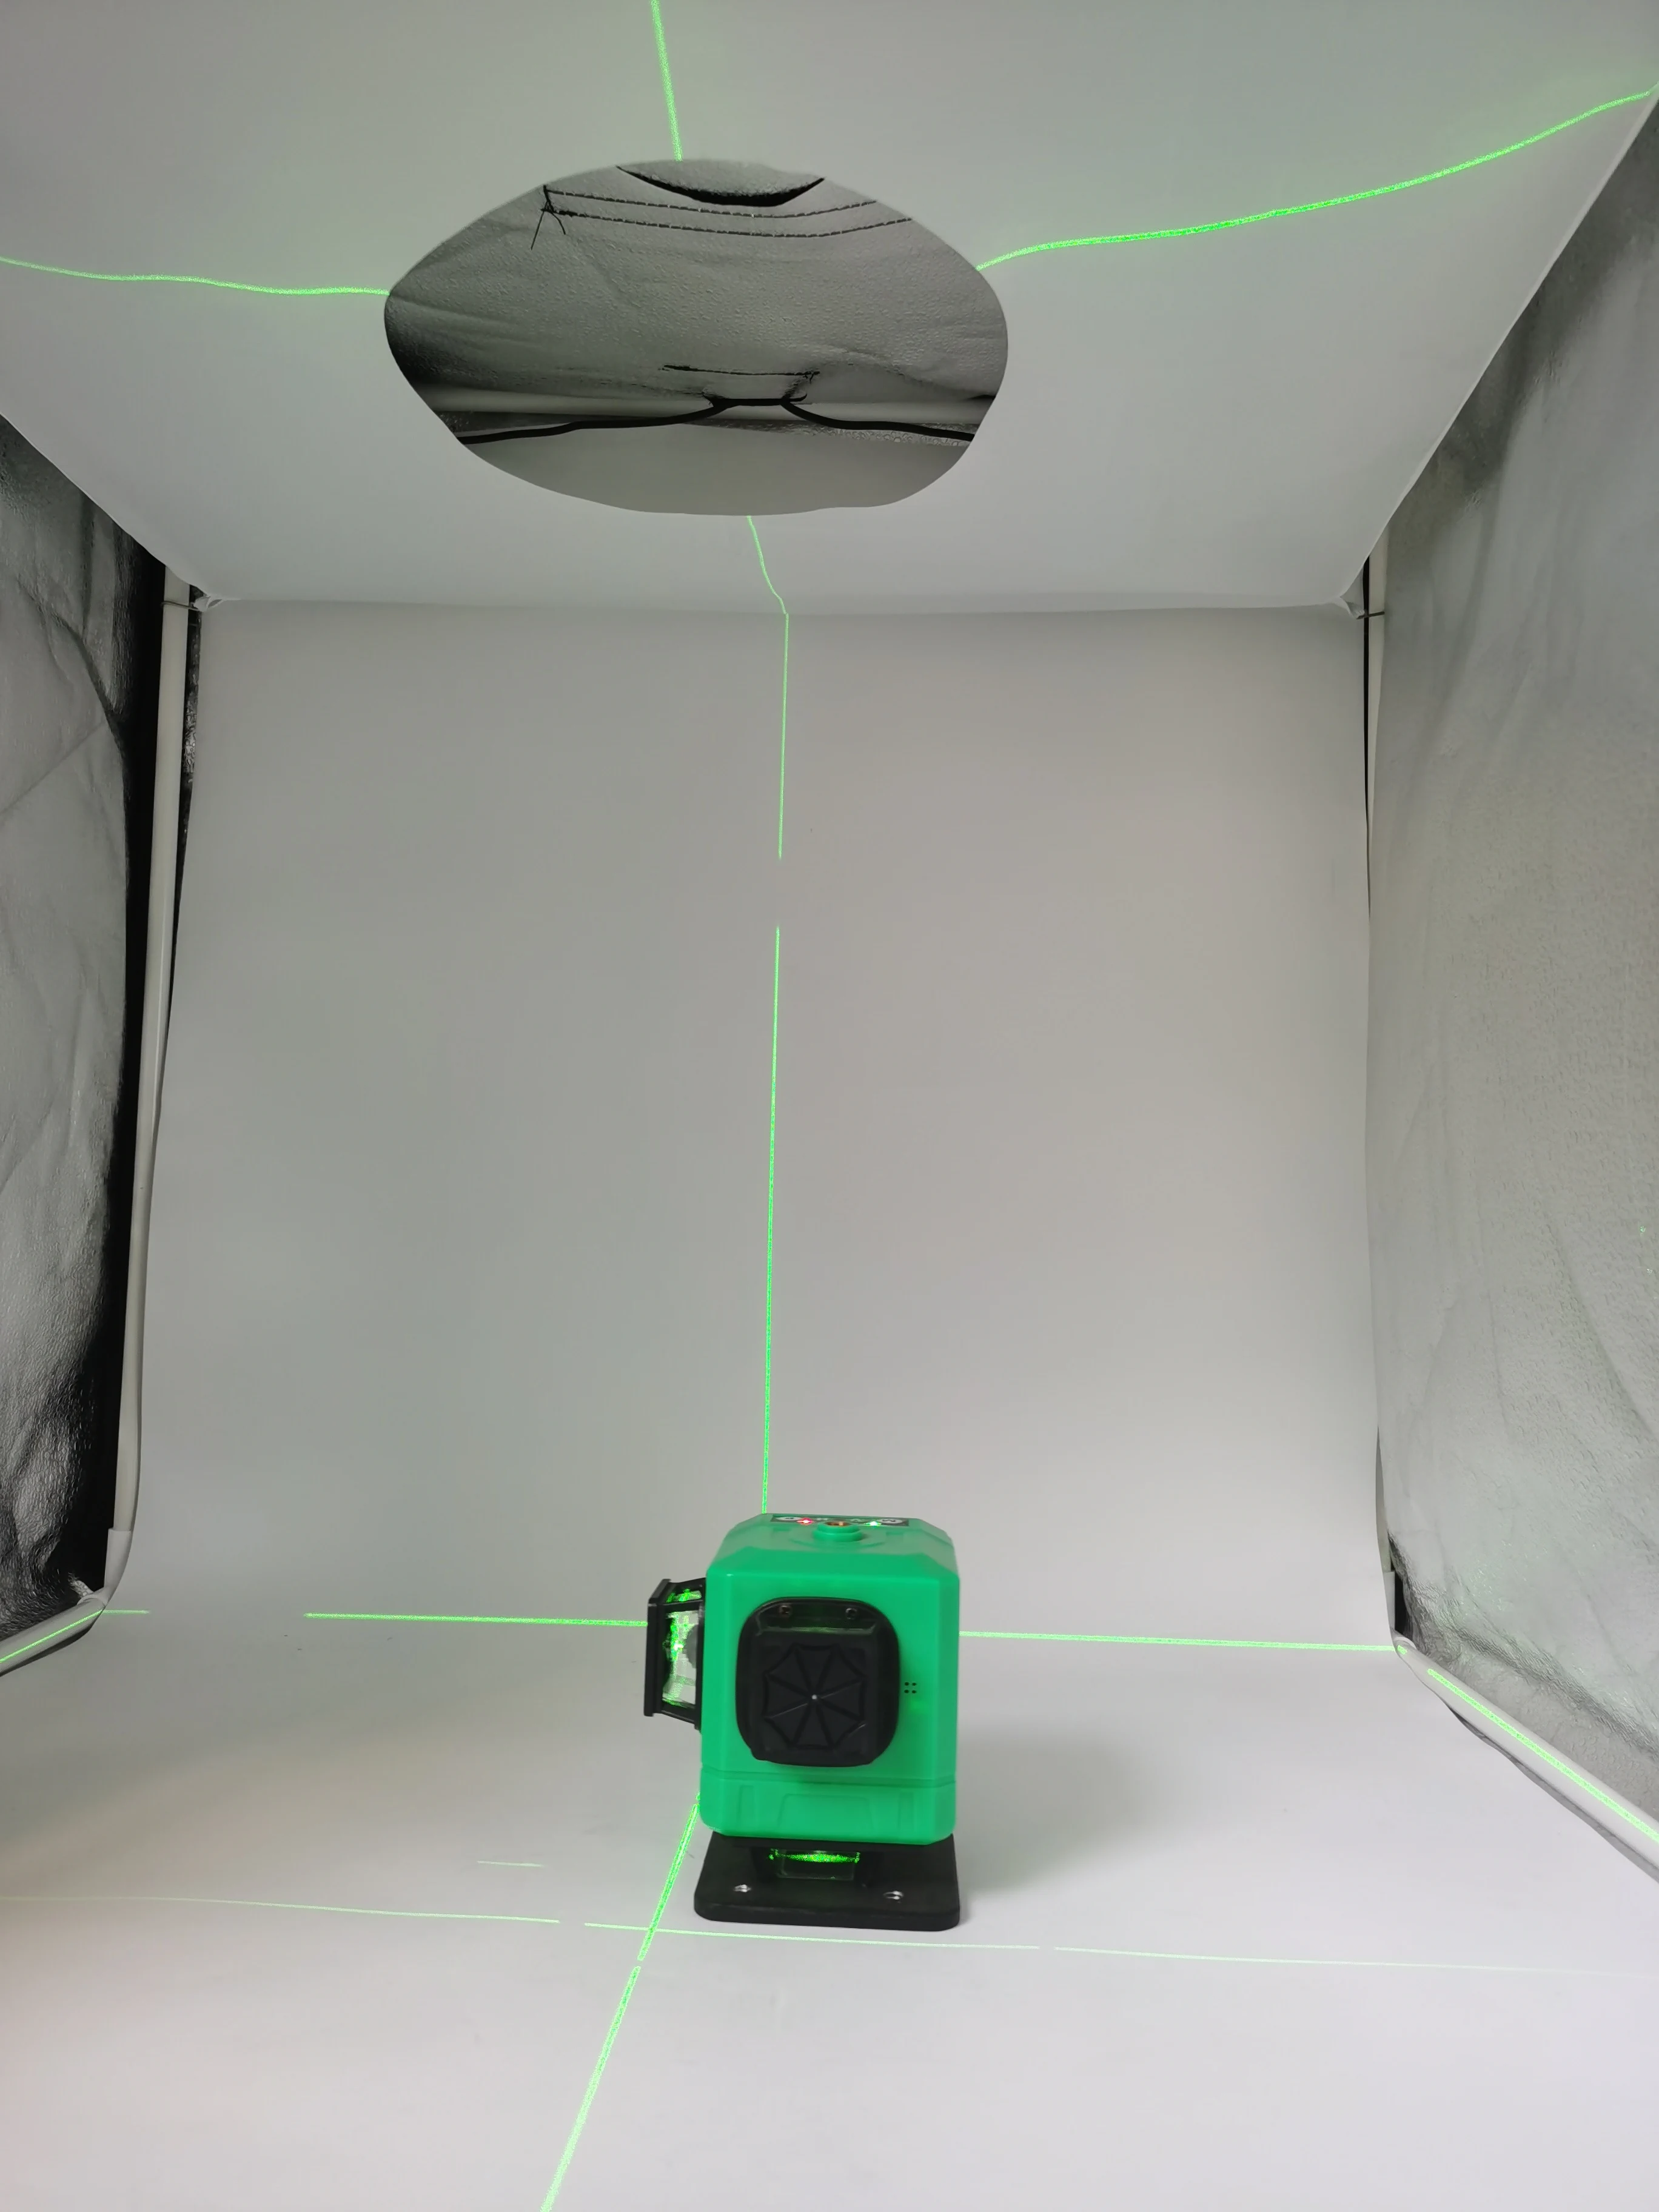
Application
This Auto Leveling Laser Level is easy to use for a variety of applications, it is ideal for the following applications:
1.Laying tile and flooring
2.Installing closets
3.Installing a drop ceiling
4.Framing doors and windows
5.Installing electrical wiring and pipes.
6.Installing banister
7.Wallpapering and stencil work.
8.Painting
9.Wall hanging of pictures, photos, artwork.
10.Room partitioning
Trouble Shooting
| PROBLEM | CAUSE | SOLUTION |
| The laser cannot be turned on | Low battery | Charge the battery |
The rotary knob button is not rotated to the position | Rotate the rotary knob once again | |
The tool is out of operating temperature range | Make sure the operating temperature within the range of 0"C~40'C | |
| Electricity indicator light blinks in red | Low battery | Charge the battery |
| Tilted indicator light lights in red and the laser line blinks | The tool is over its maximum working range | Place the tool on a more level surface, closer to horizontal (within 4") |
| The laser line is not level or plumb | The instrument is in lock mode | Rotate the rotary knob to "on" position, make sure the tilted indicator light dies out |
| Big change of the operating temperature | Wait until the temperature of the tool is close to the room temperature | |
| The tool suffers a strong impact or | Send the tool to the authorized service | |
| The laser line gets thicker or blurry | Dirt on the glass of the laser aperture | Clean it with soft cloths |
| The laser line is hard to identify | The surrounding is too bright | Reduce the room brightness |
| Low battery | Charge the battery |
Countries & LOGO

Похожие товары


