
Датчики напряжения 20AA 120 Ом для
- Категория: Sensors >>>
- Поставщик: HT,Sensor,Technology,Co.,Ltd.
Поделиться:
Описание и отзывы
Трекер стоимости
| Месяц | Минимальная цена | Макс. стоимость |
|---|---|---|
| Sep-16-2025 | 0.67 $* | 0.76 $* |
| Aug-16-2025 | 0.29 $* | 0.26 $* |
| Jul-16-2025 | 0.38 $* | 0.42 $* |
| Jun-16-2025 | 0.35 $* | 0.38 $* |
| May-16-2025 | 0.83 $* | 0.97 $* |
| Apr-16-2025 | 0.33 $* | 0.78 $* |
| Mar-16-2025 | 0.76 $* | 0.91 $* |
| Feb-16-2025 | 0.83 $* | 0.89 $* |
| Jan-16-2025 | 0.55 $* | 0.58 $* |
Характеристики


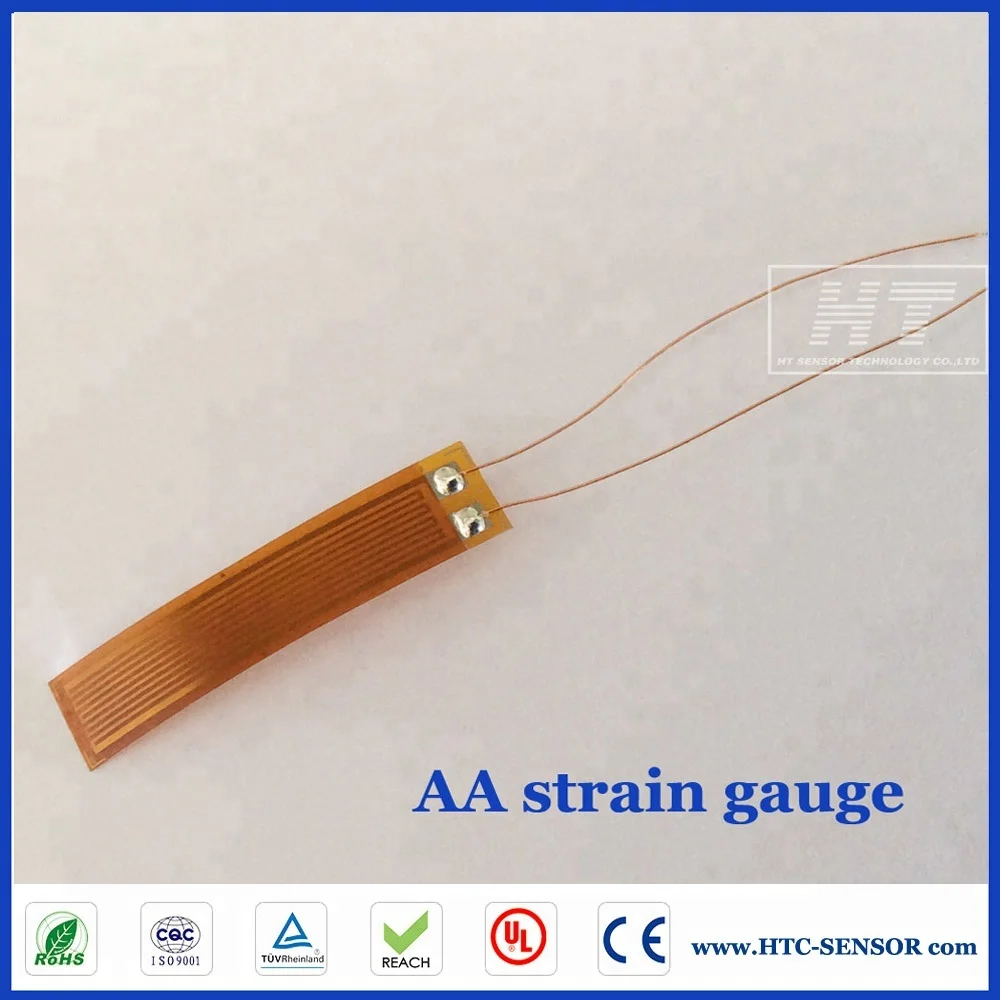
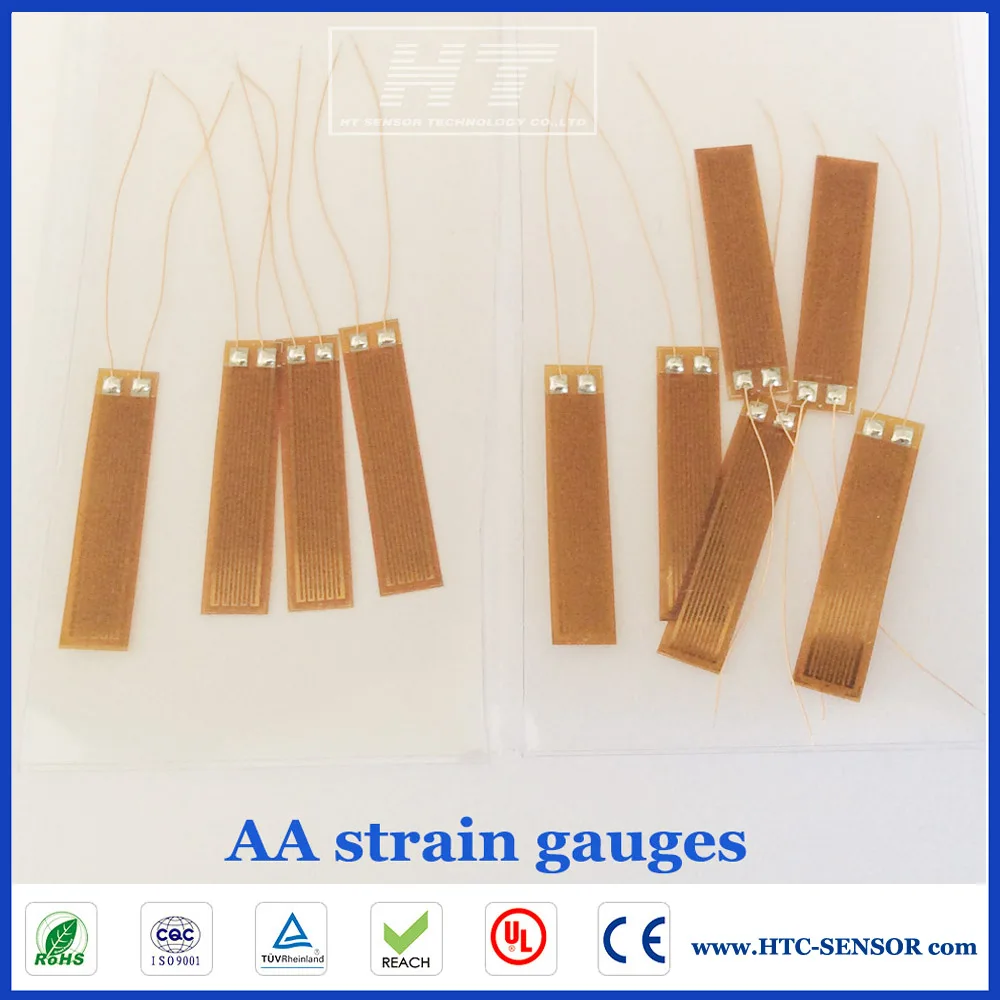
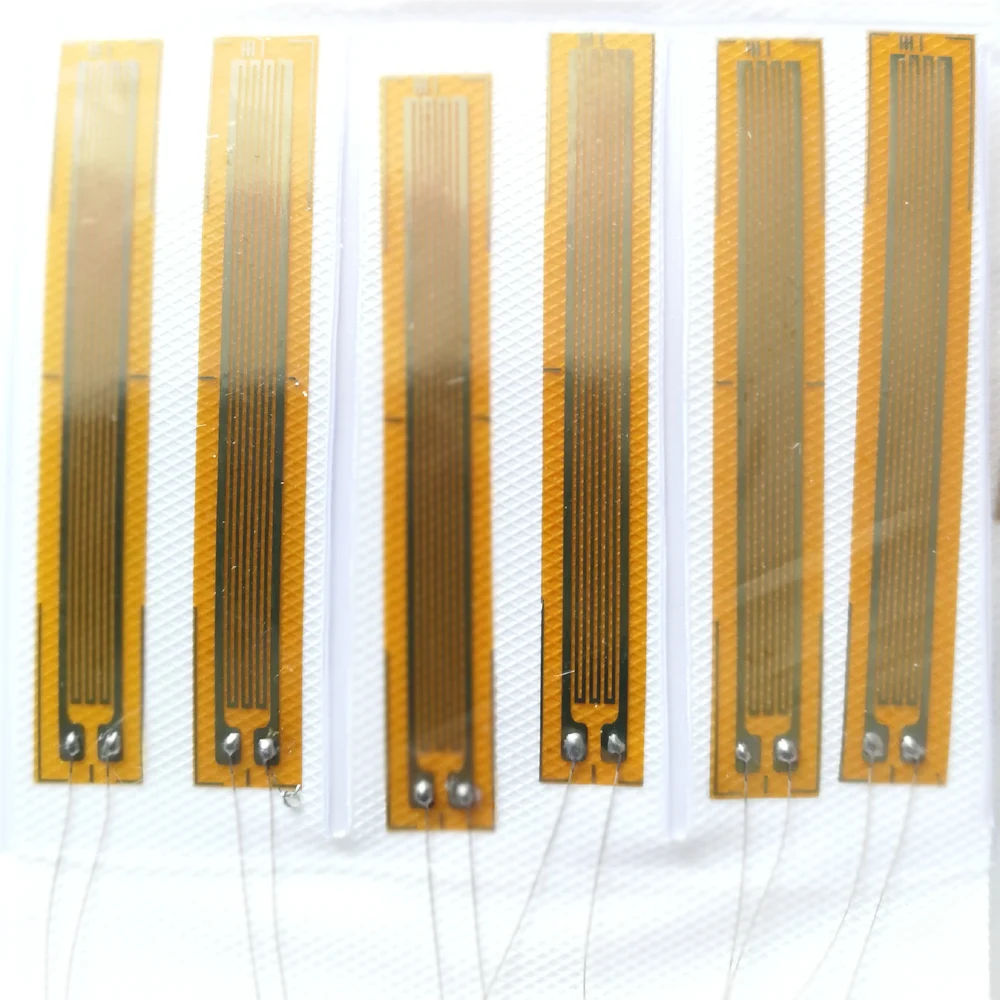
BE Series.
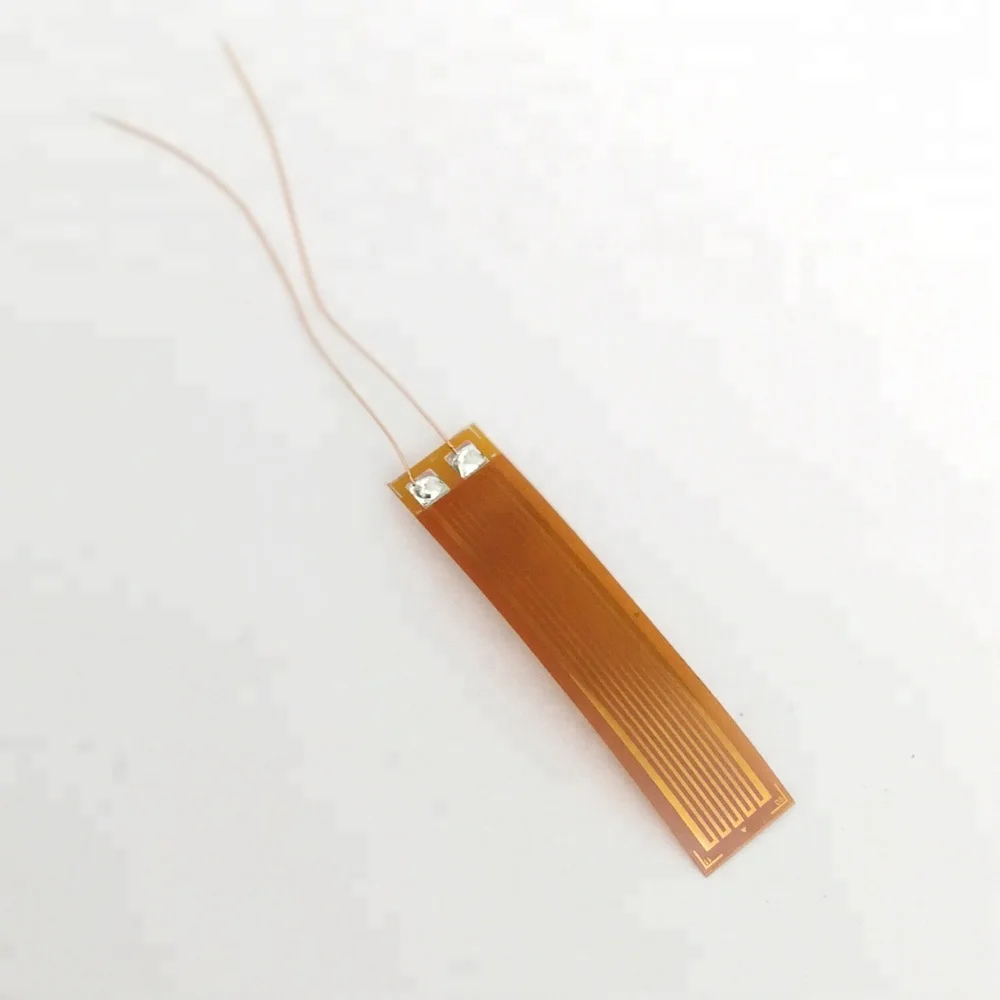
phenolic acetyl resin backing, constantan alloy, encapsulated gauges with temperature compensation good flexibility for installation used for 0.05% FS accuracy Transducers and stress analysis.
Specification | BE series |
Nominal resistance(Ω) | 60,120,350,650 |
Tolerance of resistance | <±0.1% |
Gauge factor | 2.00~2.20 |
Gauge factor resistance | <±1% |
Strain limit | 2.00% |
Fatigue life | >10000000 |
Metal foil | constantan alloy |
Backing material | phenolic acetyl resin |
Working temperature range | -30~+80℃ |
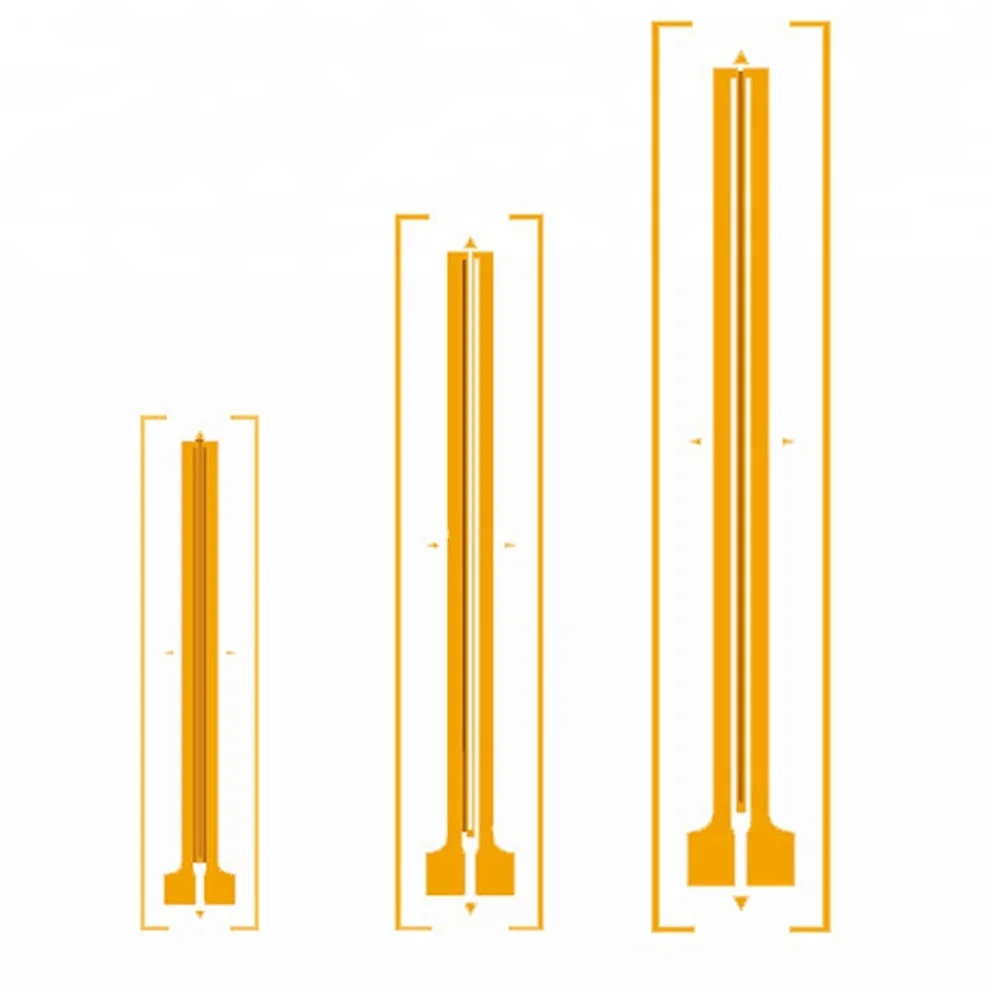
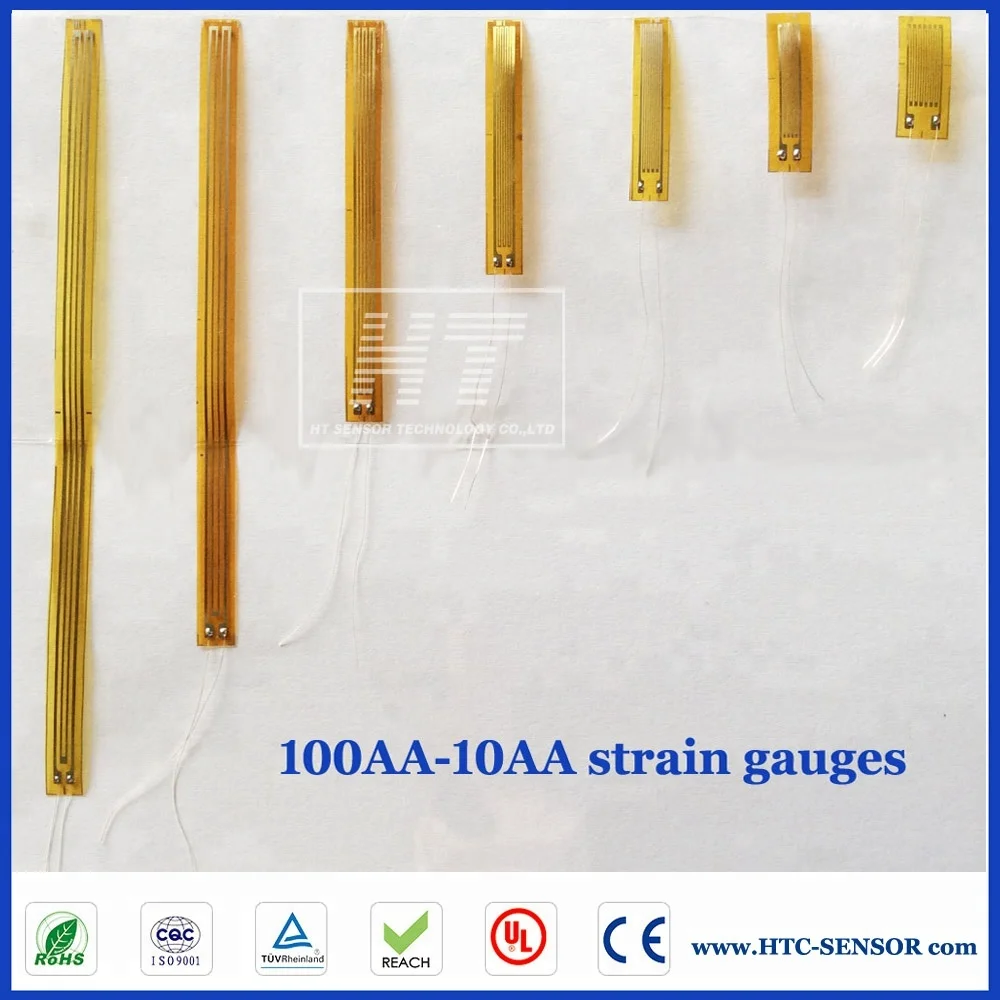
Model No. | GRID DIM | BACKING DIM | ||||
Model No. | L (mm) | W (mm) | L (mm) | W (mm) | ||
BE120-0.5AA(**)-X-3cm | 0.5 | 0.5 | 3.5 | 3.5 | ||
BE120-1AA(**)-X-3cm | 1.0 | 0.6 | 3.5 | 2.2 | ||
BE120-1AA(**)-X-3cm | 1.0 | 1.0 | 5.0 | 3.0 | ||
BE120-2AA(**)-X-3cm | 2.0 | 1.0 | 6.0 | 3.0 | ||
BE120-2AA(**)-X-3cm | 2.0 | 2.0 | 6.0 | 4.5 | ||
BE120-3AA(**)-X-3cm | 3.0 | 2.0 | 7.0 | 4.0 | ||
BE120-3AA(**)-X-3cm | 3.0 | 3.0 | 8.0 | 5.0 | ||
BE120-4AA(**)-X-3cm | 4.0 | 2.0 | 8.0 | 4.5 | ||
BE120-4AA(**)-X-3cm | 4.0 | 4.0 | 10.0 | 8.0 | ||
BE120-5AA(**)-X-3cm | 5.0 | 1.0 | 8.5 | 2.5 | ||
BE120-5AA(**)-X-3cm | 5.0 | 2.0 | 9.6 | 4.0 | ||
BE120-5AA(**)-X-3cm | 5.0 | 3.0 | 9.4 | 5.3 | ||
BE120-6AA(**)-X-3cm | 6.0 | 2.0 | 10.0 | 4.5 | ||
BE120-6AA(**)-X-3cm | 6.0 | 4.0 | 12.0 | 6.5 | ||
BE120-8AA(**)-X-3cm | 8.0 | 3.0 | 13.0 | 6.0 | ||
BE120-10AA(**)-X-3cm | 10.0 | 2.0 | 15.0 | 4.5 | ||
BE120-10AA(**)-X-3cm | 10.0 | 5.0 | 18.0 | 9.0 | ||
BE120-15AA(**)-X-3cm | 15.0 | 3.0 | 22.0 | 6.0 | ||
BE120-20AA(**)-X-3cm | 20.0 | 3.0 | 26.0 | 6.0 | ||
BE120-30AA(**)-X-3cm | 30.0 | 3.0 | 36.0 | 6.0 | ||
BE120-50AA(**)-X-3cm | 50.0 | 3.0 | 56.0 | 6.0 | ||
BE120-80AA(**)-X-3cm | 80.0 | 3.0 | 86.0 | 6.0 | ||
BE120-100AA(**)-X-3cm | 100.0 | 3.0 | 106.0 | 6.0 | ||
Past strain gauge
Step 1
Prepare all instrument and Test the
resistance firstly.
Step 2.
Marking the 45°angle’s cross stripes by the paste direction.
Step 3.
Polish the surface of bonding site by sandpaper.
Step 4
Wipe the bonding site in a single direction (must not reciprocated wiping) with absorbent cotton that dipping in or acetone till the absorbent cotton become white.
Step 5.
Strongly brush adhesive all over the bonding site and fundus site thin and equably with technical brush.
Step 6.
Cover with Polytetrafluoroethylene sheet, and roll press the strain gauge over the sheet with finger along with the axes direction, press out the protruding adhesive and air bubble.
Step 7.
Welding the lead wire. Be careful that the wire is easy to be connected to the elastomer.
Setp 8.
It must solidify according to the specification of adhesive, and can’t stop power during solidify.
Step 9.
Paste quality inspection
a. Resistance changes after Strain gauge paste; b. Insulation resistance;
c. Paste position accurate or not


Похожие товары


